In the previous post, we introduced DevSecOps on Google Cloud Platform and outlined a secure CI/CD pipeline. Now, let’s move from concepts to execution—starting with GitOps.
GitOps treats your Git repository as the single source of truth for application and infrastructure delivery. But with that power comes responsibility: your Git workflow must be secured at every level. In this post, we’ll walk through how to do that using GitHub—with real-world examples based on our sample application.
1. What is GitOps and Why It Matters in DevSecOps
GitOps is a model where your entire delivery lifecycle—from code to production—is
controlled by Git. This includes:
Version-controlled infrastructure and deployments.
Automated CI/CD pipelines triggered by Git events.
Full audit trails of who changed what and when.
In a DevSecOps context, GitOps allows us tocodify and enforce security policies early and automatically. But Git itself becomes a critical asset—one that must be tightly secured.
2. Why GitHub?
We’ll use GitHubas our Git platform for this series. While Google offers Cloud Source Repositories (CSR), it’s no longer a viable long-term option:
Effective June 17, 2024, Cloud Source Repositories is not available to new customers. If your organization hasn’t used CSR before, you can’t enable it. Another one for Google’s growing list of retired products. 😅
GitHub, by contrast, is:
Open, widely adopted, and actively maintained.
Full of powerful integrations—including native support for Google Cloud Build.
Familiar to most developers, making our series more accessible and prac
3. Securing Your Git Workflow with OpsGo
To bring this to life, we’ll use a real project: OpsGo—a simple Go-based application. This app will help us demonstrate how to apply GitOps security principles practically.
💡 Tip: Fork the OpsGo repo into your own GitHub account to follow along without affecting the original project.
🔐 GitHub Access Control Essentials
Before hardening your workflows, you need to secure access to the GitHub repository itself. Key practices include:
Use SSH keys or HTTPS with credential managers – Never rely on username/password authentication.
Enable Two-Factor Authentication (2FA) – Required for all contributors to reduce account takeover risk.
Fine-grained access control – Assign only the permissions people need (e.g., read, write, admin).
These lightweight but critical steps help prevent unauthorized access before any code is ever pushed.
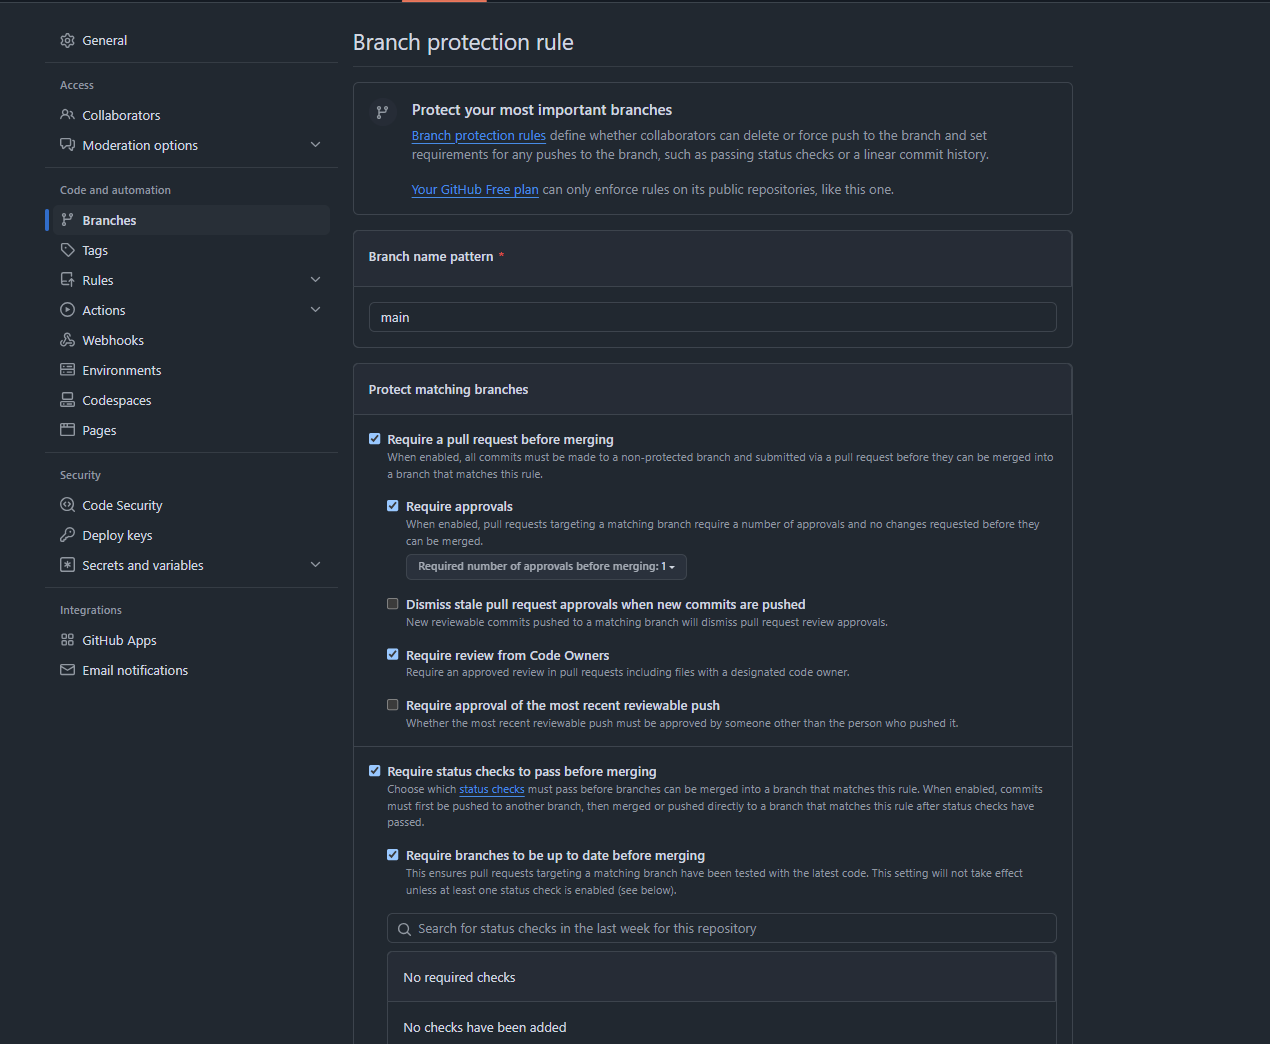
✅ Enforce Branch Protection Rules
Require pull requests for changes to main or production branches.
Require review approvals to ensure code gets peer-reviewed.
Disallow force pushes and branch deletions.
Enable required status checks to block merges if tests or security scans fail.
Implementation in OpsGo: Navigate to Settings > Branches > Add Rule in the GitHub UI and apply these rules to the main branch.
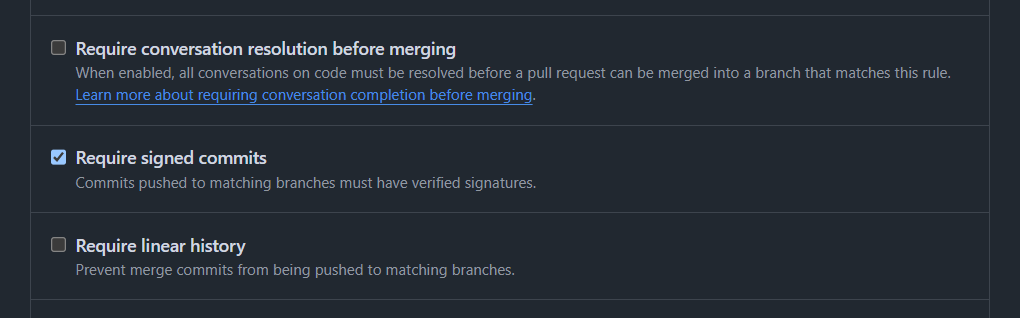
✅ Require Signed Commits
Signed commits add a layer of cryptographic assurance that changes come from verified contributors—not impersonators.
Why it matters:
Ensures trust and traceability in your commit history.
Strengthens your audit trail and aligns with zero-trust principles.
Enable “Require signed commits” in branch protection rules.
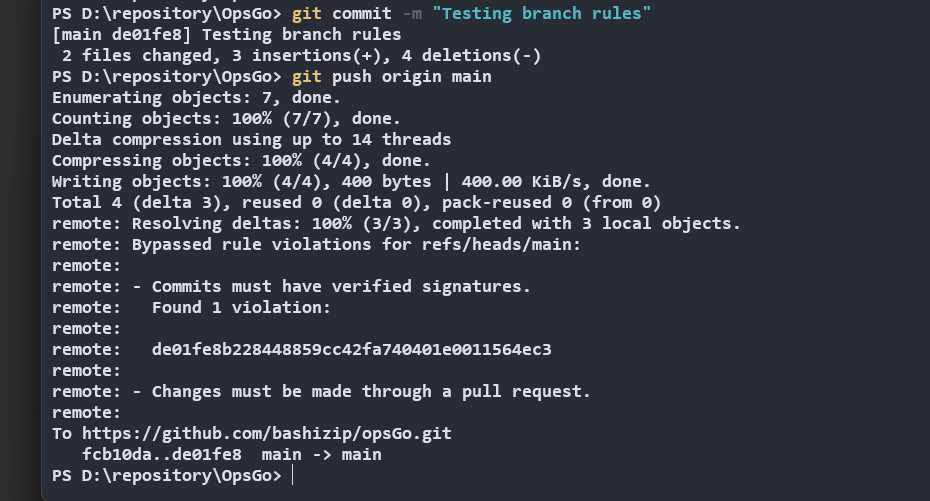
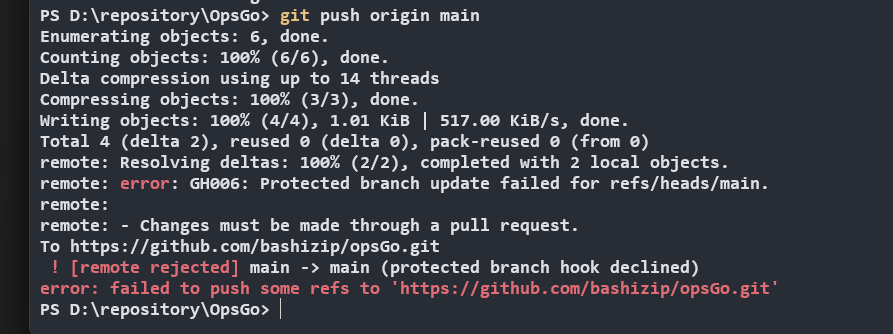
Now when you try to push a commit to the repository you get this:
What Happens When Rules Are Enforced? Here’s a real example of GitHub accepting a direct push to the main branch—despite unsigned commits and no pull request.
This happened because GitHub clearly flagged that it bypassed the rule violations:
Bypassed rule violations for refs/heads/main
This likely occurred because:
The pusher had admin privileges ( that's the case here )
The rule was not fully enforced.
Or the action bypassed the rules via a GitHub token with elevated permissions.
It’s a powerful reminder: GitHub won't stop admins or CI bots by default unless explicitly configured.
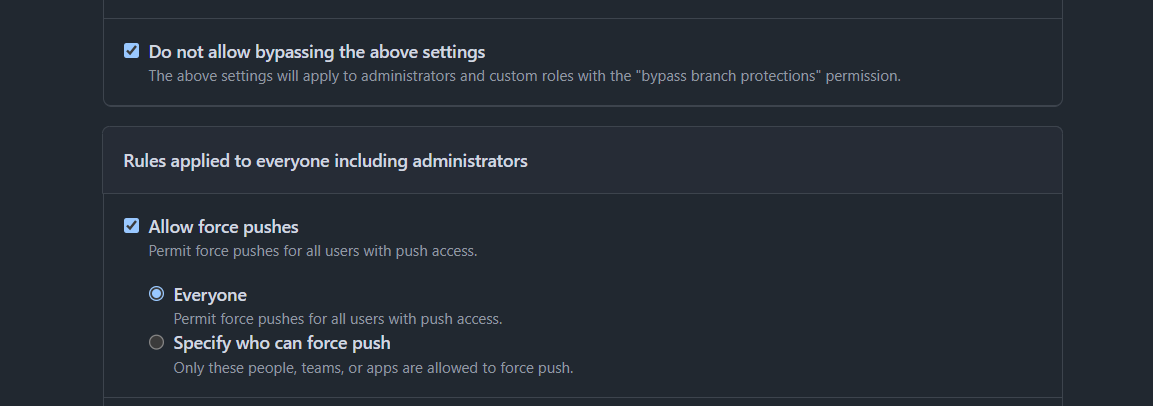
Make sure to enable these options in branch protection rules:
✅ Require status checks to pass before merging.
✅ Do not allow bypassing the rules.
✅ Include administrators.
Double-check your configuration—security by policy only works if it’s enforced.
Try it yourself: make a small change in the main.go file—like modifying the default port value—and commit the update to your forked repository. This will let you test the enforcement of your protection rules.
🛠️ How to Fix These Violations
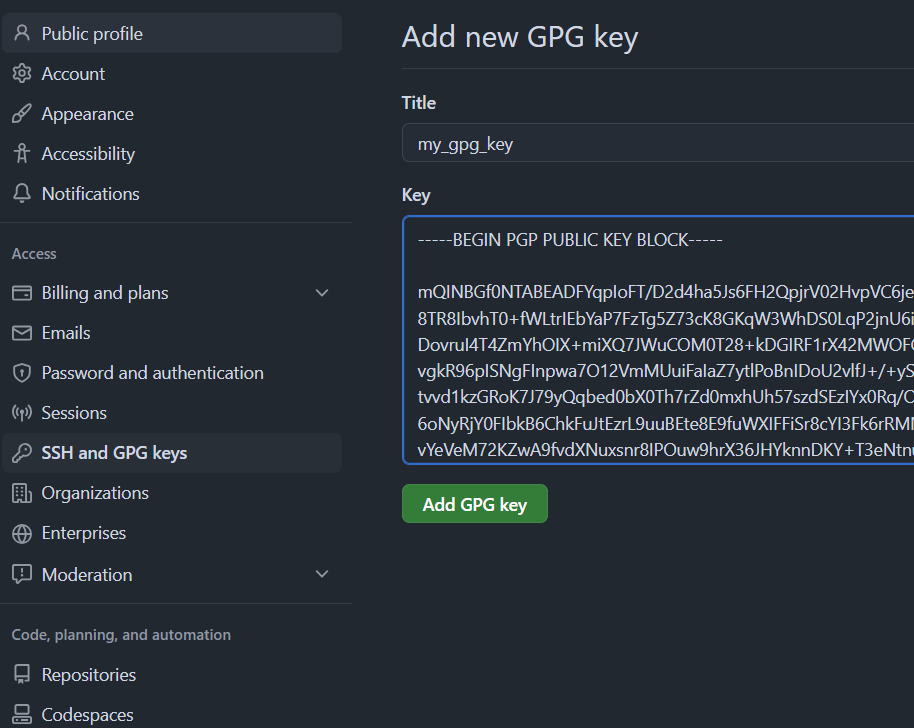
🔑 First Generate and Publish Your GPG Signing Key
Generate a new GPG key (if you don’t have one):
gpg --full-generate-key
Choose RSA (default), key size 4096, and set an expiration if you wish.
List your GPG keys to get the key ID:
gpg --list-secret-keys --keyid-format LONG
You'll see output like:
sec   rsa4096/ABCDEF1234567890 2025-04-07 [SC]
      Real Name <you@example.com>
Your key ID is the part after rsa4096/ (e.g. ABCDEF1234567890).
Copy the output and paste it into GitHub > Profile > Settings > SSH and GPG keys > New GPG key.
Managing keys:
Use gpg --edit-key <key-id> to manage expiration or revoke access.
Backup your keys securely.
Rotate periodically or when compromised.
Now you can commit your code beacause it's signed but you get error on push:
To fix this one,
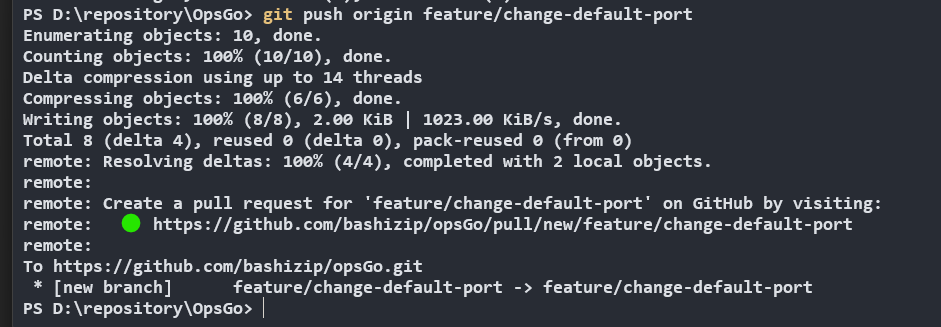
Instead of pushing directly, create a new branch :
git checkout -b feature/my-change
Push your branch and open a pull request:
git push origin feature/my-change
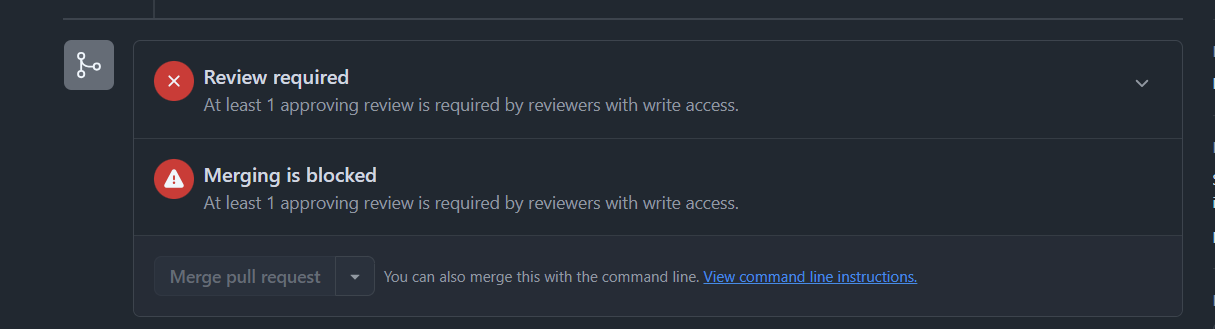
Submit your change through a PR for proper review and merge.
Before a pull request can be approved, it must be reviewed by at least one collaborator. You’ll likely need to invite another contributor or use an alternate GitHub account to simulate this process.
By following these steps, you’ll satisfy both the branch protection and commit signature requirements.
✅ Secrets Management
Never store secrets in Git. Instead:
Use Google Secret Manager to manage secrets.
Load them via environment variables or CI/CD at runtime.
Use tools like gitleaks to catch accidental secret leaks.
🔐 What GitHub Handles — Without Duplication
We’ll use a few GitHub-native features that complement—not conflict with—our GCP pipeline:
✅ Secret Scanning & Push Protection GitHub can detect and block secrets in code before they ever reach CI/CD.
🚫 Code Scanning (CodeQL) We’ll skip it, since we use SonarQube in Cloud Build for SAST.
🚫 Dependabot Alerts Trivy handles dependency scanning and container vulnerabilities in our build pipeline.
This gives us early GitHub-level protection, with centralized security enforcement in Cloud Build—the best of both worlds.
4. Coming Up: Cloud Build & Secure CI
Now that our Git workflow is secured, we’re ready to build! In the next post, we’ll set up Cloud Build and show you how to integrate automated security checks like SAST and container scanning directly into the pipeline.
Stay tuned—because from here on out, everything you commit goes through the DevSecOps gate. 🔐🚀